All of my cutting file shares are free. Please do not redistribute or sell what I freely share. These cutting file shares are for personal use only.

Please be fair and give credit where credit is due, in turn, I will always make an effort to give credit to my resources and link them appropriately. Thank you for your consideration.

Wednesday, January 30, 2013

My Blog Hop Shares Download Link

UPDATE: For those of you whom were not able to download this cutting file, I apologize. I contacted Box.net about the band width problem. They told me my 10 GB of band with was used for the month because this cutting file had been viewed or downloaded too many times. They will re-set my band width at the first of the month. Tomorrow is the first of the month....woohoo!


For those of you who are having trouble downloading the card cutting file for the January 28, blog hop linked on Pinky Papercraft's blog I'm posting the link here too. I f you haven't seen the cards Helen from Pinky Papercrafts created using these card cutting files, you have to go take a look. Her cards are stunning!

Card Cutting Files Download Link

The cutting files below are in .svg, .dxf, and Studio format.


Pictured Below: Laced Edge Card with Heart Pocket inside


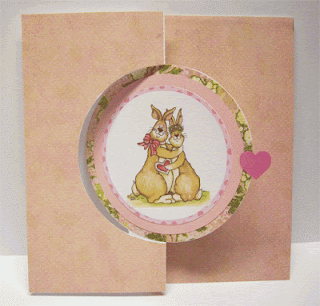
Below: Heart Spinner Card


Tuesday, January 29, 2013

Blog Hop Goodies and Inspirations!


Good day! I'm so excited to announce another blog hop collaboration. For the past couple of weeks Barb, Helen, Nina, and I have been working together to bring all of our blog visitors some new cutting file creation freebies by Barb Dersken from Lalalime blog and some more card cutting files from me here at Paper Pulse.

Wait until you see the fantastic inspirations done by the extremely talented Helen from Pinky Papercraft blog and Nina from Nina's Card Art. You're going to love what they have done with the cutting files Barb and I are sharing today.

To get some eye delight and grab my cutting file shares, please go over to visit my talented Aussie friend Helen, at Pinky Papercraft

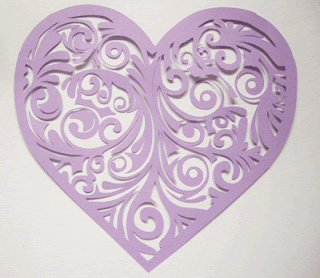
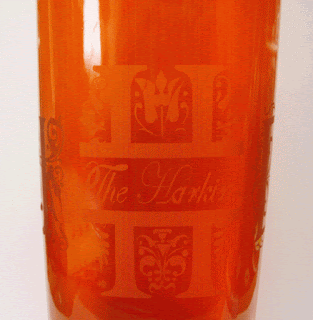
Here's a sneak peek of the cutting files I'm sharing. Wait until you see what Helen and Nina have created using the files Barb and I share today. Your really going to enjoy your hop over to their blogs.

Just to make sure you don't miss any of the places to visit today I'm adding each link below.

Places to Hop Today:
1. Pinky Papercraft this is where you'll find the download link for my card cutting file shares and Helen's amazing card designs
2. Lalalime this is where you'll find Barb Dersken's Ladybug and Inspiration
3. Ninascardart  this is where you'll find some creative ideas shared by Nina


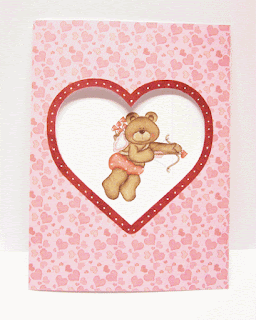
Scalloped Lace Heart Edge Card with Heart Pocket 


Heart Spinner Card


We're not done yet! Many of you already know about the kind, sharing, creative Barb Dersken from Lalalime Blog and she has more goodies for you. This is what I created using the cutting file she's sharing today.Each one of us have created something different so, make sure to visit everyone and please, don't forget to leave some blog love. 

I created this card with Barb's cutting file. As you can see, the wings open up to reveal the contents of the card. I embellished it with pink ribbon and some clear rhinestone hearts.

Ladybug Card


I can't sign off just yet. Lately, what would a visit to my blog be without a "Chalkboard" share. Here is the one I leave you with today. This was inspired by a chat with our insurance company....lol. Need I say more. :) You can download this chalkboard ------> Here


Friday, January 25, 2013

On today's chalkboard.....

I'm really enjoying making these chalkboard sayings. This is another saying I enjoy. I'm happy to say; my husband thinks I'm a thoroughbred. I hope I'm not a nag....lol

These make great fridge magnets and little gifts. This file includes .png,.svg,.dxf, and Studio formats.

You can download it ----> HERE


Thursday, January 24, 2013

You don't have to drive me crazy

Here's another chalkboard design. I think this was my motto when I was raising our family.

You can download the .jpeg, .png, .svg, .dxf, and Studio zipped file ----->HERE


Update: Here's some fridge magnets I made out of this cutting file. 


Valentine Chalkboard

I've been on a roll with Valentine day projects...lol. This one I created in Photoshop, saved it as a .png image and did an auto trace on it. If you like the chalkboard look let me know and I'll work on making some more. The zipped file download is in .png, .svg, .dxf, and Studio formats.

You can download this file-----> HERE


Wednesday, January 23, 2013

Spirella Sketch Design

After visiting Pinky Papercraft blog to see Helen's beautiful Spirella Embroidered Heart card, I was inspired to create a sketch file with a Spirella design. Take a look around while you visit Helen's blog. She is so talented. I'm sure you'll find loads of inspiration.

Since a thread, needle, and me don't do too well together I had to at least try to make a design. It is no where near as gorgeous as Helen's card but it's a start for my lack of talent with sewing. Who knows, I may get brave, grab a needle and give Spirella embroidering a try. Helen's is so gorgeous it tempts me to give it a try. I use to do Spirella when I was a kid. What happened to my relationship with sewing?...lol

To use this Sketch/Cutting file
1. Set the Spirella design to "Cut"  and the outside liner of the heart to "No Cut:.
2. Leaving the cutting file in your cutting machine. Change the Spirella design to "No Cut" and the heart shape outlining the design to cut.
3. Place the large Scalloped Heart back on the cutting area, grab some pretty paper and cut. Use this piece to place on top of the Spirella heart you just sketched and cut.

 Spirilla Heart Sketch and Cut  file is in .svg,.dxf, and Studio formats. You can download this file---> HERE


Tuesday, January 22, 2013

How to make a deckled edge card using your cutting files

One of the members on the Silhouette Plus forum wanted to learn how to make a card and have the same edge as her peacock cutting file. Whenever a member asks a questions on the forum it gives me ideas on videos to make just in case someone else out there in Silhouette Studio land want to make something similar.

This video will walk you through the steps on how to design your own "Deckled Edge Card" using a cutting file design you already have. Below is an example and the video.


Monday, January 21, 2013

Update Double Sided Print and Cut with the Silhouette

Update: I need to correct something I said in the first post of this post. I also need to admit to not being a good listener. Kay said; when placing the card back into the printer; "What comes out last goes in first"...oops I placed what came out first, back in first. I made another attempt after listening to Kay's video again and it worked perfectly just as she said it would.  I'm so glad to learn I don't have to flip and rotate the image when saving the two sets of cutting files.

My friend did ask me if I would make her a template so she can easily do this. I made one and thought to share it here.In this template I used a pattern I have in digi paper to fill the front side of the card. You can change the pattern to what you desire by filling it with another pattern or dragging a digi paper into it. It's set to "No Cut" so it will only  print the fill/pattern of your choice. Please make sure you read below and check out Kay's tutorial posted on her blog.

You can download the 2 Double Side Print and Cut Templates ----> HERE


She did it again. The wonderfully brilliant Kay from her blog: Clever Someday has made using the Silhouette cutting machines and Studio software even more fun. For a while I had been thinking how nice it would be to be able to do a double side print on the cards I make using the Studio software.

My hubby would fuss at me for never placing a Hallmark on the back of my cards, I did buy a stamp to fix this problem but now, I can put that often forgotten stamp away thanks to Kay and her brilliant tutorial on Double Sided Print and Cut Video Tutorial. She makes some excellent videos. I never get lost along the way when I follow her tutorials. Thank you Kay for doing this. You're the best!

I couldn't wait to try doing a double sided print and cut. I followed Kay's instructions and tada! I had a Valentine card complete with Hallmark and all. I did have to make a couple of adjustments to the wonderful instruction Kay gave. My printer required me to rotate the inside image 180 degrees to get the image for the inside to print in the correct place. I've already made myself a couple of card templates. I'm so thrilled to be able to print and cut on both sides.

Below are some pictures of my very first card doing a double side print. As you can see, I filled the front part of the card with digi paper, then I made a heart to outline the shape of the heart, I added a Valentine graphic from the collection: "Bearing All Seasons" by the artist; Colleen Parry.

Check out Kay's wonderful tutorial and have some Print and Cut fun. xxx- Debbie


Finished Card

Inside of Card
Hallmark on Back of Card

Wednesday, January 16, 2013

Flip It Card Templates...You asked for it...

Recently, one of my blog donors asked if I could make a circle "flip it" card cutting file. She has been so kind to donate as several of you have. In honor of the kindness and generosity several of you have shown I made these in the spirit of giving.Another great big thanks to those of you whom donate and make it possible for me to freely share.

The circle flip it card is similar to the Sizzix die.One of the many great thing about the Silhouette Studio Designer Edition software is to be able to design and create our own cutting files. This is my rendition of a circle flip it card but, I couldn't stop there.....lol. I've also created what I call a shape flip it card.

Last night I kept myself busy designing and test cutting both of these files. When I  make and test cut files, I usually don't place a whole lot of time into embellishing them. I know the ones you make will look amazing. If you get the chance to try out one or both of these cutting files, I would love to see what you did with it. Please email me a picture and I'll share it here.

Wishing Blessings to All - Debbie

The circle flip it card has two designs. One is solid and the other has a lovely lace like pattern. Both are included in this cutting file. The zipped folder is in .svg, .dxf, and Studio format. Both designs for the circle card are pictured below. One picture shows the card closed and the other opened.

You can download this file ------> here


Below are some pictures of the "Shape Flip It Card" You can download this cutting file---->  here


Thursday, January 10, 2013

Valentine Lace Heart Freebies

What would a Valentine's day be without those terrific lace hearts. Here are two I designed to share with all of my blog Valentines. As always, I test cut both of these cutting files. I did cut them large. I'm not too fond of getting intricate designs off the cutting mat when they are smaller. I do cut them in a smaller size but not a test cut....lol.

These files are zipped and in .svg, .dxf, and Studio format. I hope these help make something special for you Valentines. xxx- Debbie


Download the "Lace Floral Heart" here *I updated the link. It should work now. :)


Download the "Splish - Splash Heart" here


Wednesday, January 9, 2013

Valentine Cutting Files Are Here and a New Video

I was able to get a lot more done today than I thought. My grandbaby was only able to have a short 2 hour play day with me so I got busy working on these cutting files to share and a new video on how to make a split monogram. Now that I'm back in the saddle again, I plan on making more new videos.

These are the links to the cutting files. They're in .svg, .dxf, and Studio format.

You can view the video on how to make a split monogram here if you would like to see it on YouTube or on a larger screen. You can download the "Regal" font here


Download the "Be My Valentine" pop-up card here


Download the "Mickey and Minnie Kiss" pop-up card here


Download the "Valentine Decor' Box" here 


Coming Soon

What a beautiful sunny day it is today. I love the sunshine. Its invigorating! Since I've been on the mend, the holiday activities have come to a halt, I've kept busy creating cutting files and soon, I'll be making more videos.

One video I have in mind to make is, "How to Make a Split Monogram with the Regal Font". Whew! what a long title.

Today, I'll be spending time with our youngest grandbaby. After my play date with her I'll be sharing some new cutting files and hopefully get one of the videos I have in my made so stay tuned.

Here is a sneak peek of the ones I would like to share with everyone. The Valentine Decor' Box looks amazing in a lit room. I even place some battery operated tea lights in the bottom two heart shapes to get such a romantic look.

Most of you know how much I love pop-up cards so of course, I made two Valentine pop-up cards to share.


Monday, January 7, 2013

Love Charm Necklaces

I finally got around to making the necklaces from the cutting file I shared below. Using some light weight card stock with the Cameo set at a Speed -3, Thickness - 33, and Blade - 10, Double Cut selected, I cut out two different sizes of the "Love Charm". Using two layers of each size I glued them together and painted them with acrylic paint. After the larger in dried, I used a white gel pen to add some design to the charm. After both were painted and embellished a little I dipped them in Utee. For making jewelry I like to add Flex but was out so I just used the Utee without it.

After dipping the pieces in Utee I decided to try adding some glitter to the small "love charm". The Utee looked a little lumpy so I used an embossing heat tool to smooth it out. Next, it was time to figure out how I wanted them to hang. For the larger charm I used ribbon and some wood beads. The smaller one I used some pretty clear glass beads and a couple of Swarovski crystals to place on each side of the heart. I added the clasp and tada! a necklace is born. :)

It's always nice to spend the day crafting. I glass etched the wine bottle and made two necklaces. Doing both of these little projects made for a nice crafty day my little granddaughter will appreciate when she puts on her new "love charm" necklace her grandma made with love.


Wine Bottle Etching

I just love using the Cameo to cut out shelf liner or vinyl to create patterns to etch with. This is my latest etching adventure.We were given a bottle of home made wine in a bottle with a flat front and back. We really only have red wine on occasions so this bottle of home made wine made its way down the drain so I could play with the unique bottle it came in. The front and back of it is flat with rounded edges. It's hard to see what it really looks like in the picture.

Using the Regal font I created a monogram with the Studio Designer Edition software. I cut it out on vinyl and weeded out all of the pieces to create a sort of negative pattern so when I etched it the design would show. This was a doozy of a job. I have to admit, it took quite a while to weed all of it and I had to be very careful not to pull away the wrong pieces.

After it was all weeded I used transfer tape to wrap it around the front and sides of the wine bottle. I applied Etch All to the bottle, let it sit for 5 minutes, rinsed it of real well then cleaned it all up. I filled the bottle with red food coloring and added beads to the neck of the bottle to give it a little flair. The food coloring looks orange in the photo but it truly is red. :)

If you have some glass laying around get some Etch All and use some scrap pieces of vinyl to try some fun glass etching. Learning to glass etch will be fun and make some really nice gifts. An example is something like a nice glass cake baking dish with "From Debbie's Kitchen" etched on it. This is a great personalized gift that will be treasured. The wine bottle is something my hubby asked me to do and he was thrilled with the way it turned out. Next time, I'll ask him to do the vinyl weeding.....lol. Here's a bunch of pictures to show how it turned out.


Sunday, January 6, 2013

Love Charm

Love is in the hair and ca be on a charm. I designed this sweet little love charm and tag for the sweet, loving Valentines in your life. I'm going to try to cut two of the charm shapes out on some cereal box weight chipboard since the Cameo really shouldn't be used to cut out heavy weight chipboard. I'll paint it with some acrylic paint, perhaps add some glitter, seal it and make a charm for our 4 year old granddaughter who loves to accessorize.I'll make sure to post a picture of what I do with this when I get the chance. What are you going to do with this cutting file?

This cutting file is in .svg, .dxf, and Studio format. you can download it here.