All of my cutting file shares are free. Please do not redistribute or sell what I freely share. These cutting file shares are for personal use only.

Please be fair and give credit where credit is due, in turn, I will always make an effort to give credit to my resources and link them appropriately. Thank you for your consideration.

Friday, August 30, 2013

My First Gelli Plate Experiments

With the next few days to myself I decided to plunge into everything....lol I love having the time to be crafty, creative, hanging out at the Silhouette Plus forum and emailing. This has been such a wonderful and therapeutic time. I've missed all of you so much.

Myoriah from Crafting The Frugal Way got me on a roll with this.Thanks Myoriah! She does so many awesome experiments and so kindly shares ideas and crafty money saving tips. I was so excited to try making a home made Gelli plate when I took a look at her paper. I didn't get to try Myoriah's recipe since I didn't have any Vodka on hand but I would have loved to have tried it. At the time I also didn't have any Knox Unflavored Gelatin on hand so I began to Google other recipes when I came another recipe from The Frugal Crafter. I  read her recipe which asked for Glycerin and of course watched her video. She's so bubbly...I enjoyed her enthusuasitic video. I had plenty of the Glycerin on hand. She had one recipe where Alchol could be added and one with glycerin. I was concerned about the odor of the alcohol so I opted for the glycerin recipe. There is not odor and it turned out great!

Here are some notes and the exact way I made it. I posted about my endeavors on the Silhouette Plus forum so being a little busy I decided to take a short cut by copying and pasting what I had posted on the forum.

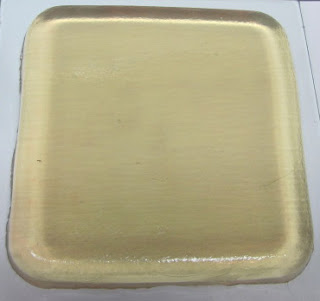
Mix together 12 ounces of Glycerin ( I had 2 - 6 ounce bottles on hand) with 7 one ounce packets of Unflavored Knox Gellatin. After I thorougly mixed the Glycerin and the Knox Gellatin I slowing stirred in 1 1/2 cups of boiling water and mixed everything together until I no longer felt the granules of the Know Gellatin. I poured it into an 8 x 8 glass baking dish. Now to see if it works. biggrin 


I bought the Glycerin at the drug store earlier in the year. I use it to make home made super bubbles for the grandkids so I had plenty on hand. The Unflavored Kox Gellatin was easy to find.It was in the bakery section of the grocery store on the bottom shelf with the regular gelatin. Our grocery store is a bit pricey on it a 32 ounce box is $16.99 but I bought 2 of the 4 ounce boxes at $2.95 a box and used 7 out of the 8 packets in the two boxes. The 4 ounce box was $2.69. The glycerin comes in 4 and 6 ounce bottles. The 4 ounce bottles are $1.99 and the 6 ounce bottle were $2.49.
Below are lots of pictures of the home made Gelli Plate, papers, and a couple of sample projects. I could hardly wait to see how the Silhouette would cut this paper. For the butterflies I used one of my least favorite papers. The paper was made with what was left behing on the Gelli plate. I'm still very new to this and have lots more experiementing to do. Myoriah waters her paints out a bit and used makeup sponges to sponge it on. Since I don't own a brayer ( I know, what kind of crafter doesn't own a brayer....lol) I wrapped my rolling pin in waxed paper and rolled away. It left some lines and crinkles I didn't care for so I ordered a brayer. I'm officially a crafter...hee,hee.
 My thoughts are wondering. I almost forgot to explain how I made these papers with the acrylic paint. I used regular craft store acrylic paint to make the papers. Nothing fancy about me. I squirted out blobs of paint onto the home made Gelli Plate then used my fatihful rolling pin to bring it all together. I have some old Stampin' Up rollers with designs in them so I rolled them across the paont on the Gelli plate. You can use all sorts of thing around the house to create some beautiful designs. I saw so many beutiful papers made with the gelli plate.

You can find lots of videos and tutorials on the internet. I like having Myoriah as my resource. She never hesitates to try something new. I did enjoy seeing all of the gorgeous papers I saw while I was Googling my way through Gelli plate information.


My 8 x8 Gelli Plate


My First Paper Design


Second Design


Paper Made with What was left on the Gelli Plate
I made the butterflies with this paper


I didn't get this smoothed out too well. The next time, I'm going to
try thinning out the acrylic paint with some water as Moriah suggested.


Butterfly Close Ups made with least favorite Gelli plate made paper.


A sample card made with the Gelli Plate paper butterflies.


A box cut out and made from the Gelli plate made paper.


Top of the box


I still had left over paper so I punched out some pieces to keep on hand.


Thursday, August 29, 2013

Recessed Window Card

With my mom visting with my aunt and all of the other things I've been able to get ahead of I was finally able to spend a little time in my craft room. I made my grandson a birthday card last week then created a neew cutting file with two types of recessed windows card cutting files. I made and shared one similar to these in the past but this one is a bit different and I hope it will come in handy for your card making creations.

One version of the card you will find a sort of "all in one" recessed window. This file will can be easily made by folding the scored areas back and gluing the flat pieces. The other one you will cut a box that will fit around the opening of the window. I made a liner for the inside to cover the folds or the box so it will look nice on the inside and you'll have extra room for writing a message.

I hope you all enjoy this card cutting file. I will try to blog more often. I've missed blogging, crafting, and all of you. Enjoy a happy crafty day.

You can download the .svg, .dxf, and Silhouette Studio Recesses Window Card ----> HERE

Here is a picture of the sample card I made. I forgot to take a picture of the inside...oops.


Wednesday, July 17, 2013

Leaving You With Flowers

Many have noticed I haven't been around nearly as much. Many things have been going on in the lives of my family. One of the many things I haven't shared until today is the part of my life and the lives of my two daughters. I was once married to their father for almost twenty years. Our religious beliefs and other things in our marriage had taken different paths so we divorced over seventeen years ago. We've had many ups and downs in our lives but one thing which never left either of us is a certain kind of love. My former husband has been battling colon cancer for over a year. A couple of week ago he learned he has the KRAS gene which has mutated his cancer. The oncologist has given him two to four months to live. We are beyond words of expressing our sadness so I leave today with an explanation for my absence and to let everyone know if you email, call, or have been missing me on YouTube or the Silhouette Plus forum my heart, spirit, and mind has been in other places. I thank the good Lord for keeping my faith strong even though my heart aches. God' will be done.

I leave this blog today with a message of love. Make every moment memorable, don't sweat the small stuff, take the time to smell the roses and spread the love. May this peony cutting file be a little reminder of making the best of every day. Love and hugs, Debbie

You can download the cutting file here. It's in .svg, .dxf, and Studio formats...enjoy! Peony and Leaves Cutting File


Friday, July 5, 2013

Newest Video Tutorial - Splitting a Design


Recently, I received an email asking me how to place two digital papers or pattern fills into a circle, add an image and other elements which needed to be a part of the entire design. I was asked how to do this so she could make closet dividers for children. I wrote her back with written instructions but she thought it would be more helpful to have a video. I agree with her. It is much easier for me to learn when I see things done so today I made the video. My Mom and sister are out shopping so I stayed home to get this video made, some laundry done and a few other multi-taking things....lol.

I hope this video will be useful for other designing needs. It's amazing what can be done within the Studio program. Happy Designing, Creating, Crafting, and Cutting


Sunday, June 30, 2013

July Cutting Files Have Arrived

Hello everyone, Before I type a thing I want to send out a big THANK YOU and a big HUG to all of you who have so kindly made donations. They have helped keep me in crafting supplies and an added bonus; they have made my hubby happy. He like me paying for my own craft supplies and this sure helps with our home budget.

As many of you already know, each month I create a set of cutting files for those whom make a donation in that month. I started making the July files as soon as I posted the June files. Each and every file I make is test cut and comes in three file formats (.svg,.dxf, and Studio). All of them also have photos of the projects.

I don't want anyone to miss out on these cutting files because they are on a tight budget or limited income so please don't be too shy to email me. I will be happy to send them to you. I know many of us have had to tighten our belts but nobody should miss out on fun creative times.Paper crafting is sure a nice way to fill a day and relax.

These are the files which will be emailed for those whom send a donation in the month of July. I can't take all of the credit. Many of the files I created were inspired by a lovely, very creative, and so inspiring. Her name is Eunice. I discovered her at her blog A Star for Chiemi. The "Tissue Box Card" and the "Pop Up Bear in a Box" were both inspired by her shared creations. I love all of her projects but these cuties melted my heart so I went off to start designing my own version.

The "Close to You" card was inspired by a picture I saw on Google Images. This one was a doozer to create. I saw the adorable boy and girl sitting on the bench and knew I had to make a card just like it. It took some time and figuring out but it turned out soooo...cute. I love the way the tab is pulled and it has this sweet little couple snuggled on the bench. It's very easy to put together. All you have to do is make sure you place the white strip of paper in between the bench area. Place the girl in her place on the bench, add a second girl by adding some pop dots (this will help the boy place his arm behind her). Glue the boy on the other side of the bench. Make sure to only glue the him to the white strip.The strip itself will go over and under. This means you will  tuck the ends of the white slide strip under the slits. The picture will be helpful.

Another one of my favorite kind of cards are the flip-it cards. The "Fancy Flip-It Card" is a fun card to make and they are always fun to receive.

The "Cherry Blossom Card" is another cutting file you will receive. This card is my favorite. I designed it for a very special lady who has inspired me with her kindness. I know she would want me to share it with others.

Below are pictures of the cutting files you will receive. If you would ever want any of the previous months of donation files instead of the current files, please let me know and I will send them. Thank you for your support of my efforts to keep on creating and sharing. Hugs, Debbie


Close to You Card 1


Close To You Card 2


Fancy Flip-It Card Closed 

(The graphic of the little girl is not included in this file. It's a copyrighted image)


Fancy Flip-It Card Opened


Bear In A Box Card Opened

Instructions: There is a strip which needs to be glued in the center of the box so you can attach the bear or any other things to hold them into place when the card is closed. After you put the box together all you need
to do is glue or adhere it with double sided tape to the center of the card. Once you've decided where you want your squares of tissue paper add a dab of glue to hold them in place. 


Bear In A Box Card Close Up 


Bear In A Box Card Top View


Tissue Box Card Closed


Tissue Box Card Closed (This file doesn't include the graphic because it it Copyrighted)


Cherry Blossom Card


Cherry Blossom Card Opened


Saturday, June 29, 2013

A Better and Less Expensive Blade

***Please take a look at the update below. A new Ebay dealers link is posted 9/19/14

I am so happy! I've been using a blade holder I purchased from Ebay for several weeks but didn't want to share this news until I used it for several weeks. I decided to buy this after going through 4, yes, 4 expensive Silhouette Ratchet blades in a short time. I probably used 4 blades in a little over a month. Two of the Silhouette Ratchet blades were destroyed after hubby and I made attempts to clean out the blade housing. As much as I love my Silhouette cutting machines I can not say the same for the faulty and expensive ratchet blades. The Silhouette Ratchet blades had become a sore spot with me. They are expensive, should be much easier to clean, and should not dull as quickly as they have dulled.

When looking around for other blades I found the Ebay dealer who sold the CB09 blade holders. The blade replacements come out to only $2.83 per blade. When I first started using the blade holder I wasn't too pleased, but this was my lack of knowledge.  I spoke to my friend Kim from Scraps of Faith. She told me she loved her blade holder and blades. She was beyond frustrated with the Silhouette Ratchet blades and said she is so happy with the CB09 and will never go back to the faulty and expensive ratchet blades. Kim told me she set it to double cut and no matter what the setting she was able to get great cuts. She also told me she never changed her settings. So, I set up a CB09 blade setting of Speed- 4, Thickness - 32, and Blade - 5 and Double Cut with only exposing a rather small amount of the blade.If you purchase these blades use some scrap paper to make some test cuts to get your blade just the way you want it.

 I used the above blade settings because I use fairly heavy card stock most of the time. I have cut all sorts of card stock weights with these settings. It's worked out wonderfully! I did change the blade depth and settings when I used the 60 degree blade to cut some light weight chipboard. I exposed more of the blade by turning the black knob at the top of the CB09 blade holder to a depth slightly deeper than the depth of the chipboard I slowed the speed down to 1, the blade depth to 10, and the thickness to 33 and of course, double cut.This chipboard was heavier than a cereal box weight. The results were impressive with a nice clean cut.

At first, I thought I made a big mistake purchasing the CB09. I actually purchased two of them. One to hold the 45 degree blade and one to hold the 60 degree blade. I opened the first holder and discovered it didn't fit nicely into the blade holder housing. I grabbed some sanding paper and gently sanded the area which fits into the blade holder housing. After a little sanding I got it to fit perfectly into the slot. Recently, I used the 60 degree blade and this blade holder fit without any sanding.

If it wasn't for my friend Kim I would have given up on this wonderful blade holder. I told her when I first used it the blade did a great job, but after making some adjustments to the blade settings it was awful! She told me she never changed her blade settings and just kept it on double cut. I thought, oh my, I have to set everything to double cut. Well, at the cost of the 4 Silhouette ratchet blades gone bad I would either have to give up using my cutting machine or try the CB09 holder again. Guess what? I did what Kim asked me to try and I'm in love with these blade holders. I've cut and cut and cut some more. Every time I get beautiful, clean cuts. The intricate lace like cuts are fabulous! It's so worth the extra time it takes to set it to double cut.

The new link I shared below is a blade holder with 10 blades are $28.00. The 60 degree blade is supposed to be for more intricate cuts, but honestly, the 45 degree blade did just fine.If you buy from this seller you can purchase replacement blades at 10 for &17.00. This only comes out to $1.70 per blade. What a bargain! Oh, It also includes FREE SHIPPING and a 30 day money back guarantee.

Here is a link to the Ebay dealer where you can purchase yours: UPDATED LINK9/19/14 CB09 Blade Holder and Blades from Ebay, Joycelijane has a 100% positive feedback. I ordered from her, and received my blades faster than I thought. I hope everyone who makes this purchase loves this blade holder and blades as much as I do.

Please make sure to check out Gayle blog Ligaya's Creativity Zone to learn even more about these wonderful blade holders. She has a wonderful in depth, fully detailed blog about these blade holders.


Monday, June 24, 2013

Rosettes Red White and Blue Style

I just finished test cutting these 4th of July rosettes. I messed up when I went to place the printed paper on my mat. I sure did learn a lesson, always make sure your paper is aligned properly and very straight. I was just a little off on aligning my paper and what a cutting mess it made.

These files come in two sets. You can create them any way you would like. It takes two of each striped or star piece to create one rosette. All you have to do is fan fold the matching print and cut rosettes and glue the ends together to for the rosette. After I do this I lay mine flat with the back side facing me. In my craft room I always have a circle punch near by. You can make your circle and cut it on your machine but I just use a small circle punch and some white scrap card stock to use the punch on. I add some quick drying glue (Alleen's Turbo Tacky Glue is my favorite) to the punch out circle, then I squeeze the connected rosette together and lay the circle with the fast drying glue on top of the back side of the rosette.This will hold you rosettes together very nicely.

After the rosettes were all made I began layering them. You can make quite a variety of rosettes from the pieces in the two files. I hope you all have fun making some of these 4th of July Rosettes and that they bring your holiday gathering a little extra spark.

You can download both 4th of July Rosettes files ------> HERE
(All files are in .svg, .dxf, and Studio formats)


Saturday, June 22, 2013

Firecracker,Firecracker...Boom...Boom

Here in the United States the fireworks are ready to be set off. Here in my neighborhood we are already hearing fireworks. The grills will be smoking, the watermelon and cantaloupe sliced, everyone going to a barbecue with a covered dish and the holiday tables will be loaded with a large variety of summer picnic food. To help those whom are planning this kind of day I made a cute table decoration firecracker. It can also be used as a treat holder.

To use it has a table decoration you don't really need to add the bottom tabbed circle. The top circle with the hole in it helps hold the firecracker sparks in place. It's really easy to place. Just glue the 4 long tabs on the top outside part of firecracker tube part. I used my fingers to give the long "sparks" a curl, then twisted them at the bottom and wrapped some tape around them to hold them together so they would fit nicely into the circle piece with the hole in it.

If you want to make this as treat holder you will need to add the multi-tabbed piece. Laying it on a hard surface, fold the tabs upwards, lay the firecracker cylinder flat and glue to of the tabbed circular piece to the tube part. At this point you need to roll the cylinder piece to fit the tabbed piece. Once you've done this glue the cylinder to make it close up. Next, un-tuck the tabbed circle and add glue to the remaining tabs and fit it up inside the firecracker tube. The tab 4 tabbed piece should only be glued on two of the tabs so when the treat holder firecracker cone top is taken off the circle 4 tabbed piece can be lifted up to reveal the treats.

This is really fast and easy to put together. I set it up as a Print and Cut file but you can always turn off the registration marks and use design or colored paper. The zipped folder contains .svg, .dxf, and Studio cutting files. I hope this firecracker brings your 4th of July guests a big smile.

To download the "Firecracker" cutting file click-------> HERE


Friday, June 21, 2013

Everything Is Coming Up Roses


I'm delighted with this Rose Pop Up Card. What a display it is when the surprise of a blooming rose appears when the card is opened. I saw this card while browsing Google Images. I find so many inspirations over at Google. Then I found a site selling a file similar to this one. My search was not over. All of the sudden a diagram appeared. I new I could draw the shapes in Studio.

I made the first sample cut then realized I needed to make some adjustments so I changed up the file, cut and assembled it again. No, it was still not quite the easy to put together kind of files I like and like to share. One more adjustment, one more cut and tada! a lovely blooming rose.

To make this, cut out all of the rose shapes in the colored light weight card stock of your choice. Glue the side tabs which close up the sections of the petal then tuck the two end tabs in them in the order of the numbers I placed on the cutting file into the slits of the hexagon.On the back side either tape or glue these tucked in tabs into place. Once you have all of the rose petal shapes into place ( the center part can be a little tricky but it's not essential to get it perfect) take the hexagon with the long tabs and place them into the slits of the inner card liner and glue them into place. To make the rose look a little more rose like you may want to use your finger or some tool like the McGill Paper Blossoms Tool Kit to rub them into a shape or turn the ends of the petals.You could also glue some wood beads to the end of dowel rod to make a similar tool.

Once all of the rose is created the way you want it to look and the petals are glued to the hexagon and the strips on the hexagon are glued to the under side of the card, cut out the cover for the card. add glue or double sided tape to one side of the inner rose portion of the card, line it up to the center of the card cover then fold both cards closed. Now you can add tape or glue to the other side of the inner rose card. I do this just to make sure I have it aligned to the center and it opens nicely.

Are your ready to be charmed. Close your Rose Pop Up Card and then open it to reveal your lovely, hand created, blooming rose.

Next I created a flower. I didn't know what to call this flower so I just called it "Flower by Debbie". What a creative name.....lol. For this flower I also used the McGill Paper Blossoms tools and a quilling tool to roll the center piece. Once the center piece is rolled, let it unroll a little in your hand.You want it to look fuller and make it easier to bend out the tiny strips. Once you've let it unroll, glue the end to close up the fringed piece then place it in the center of your flower. I made a couple of really large flowers but you can resize this file to make it smaller.

All of the files I share are on .svg,.dxf, and Studio file formats. They also include pictures.

To download the "Flower by Debbie" click -----> HERE

To download the "Rose Pop Up Card" click -----> HERE

HAPPY CRAFTING EVERYONE!


McGill Paper Blossoms Paper Tool


Thursday, June 20, 2013

Summer Reading.....Who Needs a Bookmark

There are a lot of E-Readers out there. My daughter and husband both use them yet they still like the feel of a good ol' fashioned book. I prefer a book which I can hold and when I'm finished reading it, it's nice to be able to hand it over to a friend to enjoy. Yes, I love technology and all of those wonderful, fun gadgets and software programs but the feel of a paper book is still so nice for me.

Summer

While my mom was away visiting her sister I got crafty and made my avid reading friends and family some corner bookmarks. These handy little bookmarks are fast and easy to put together. I personalized two of them for two of my girl friends whom never leave home without a paper or hard back book in their hands.

I plan on making more and taking them to the ladies whom work for my eye doctor. They are so sweet so I'm going to make them some bookmarks and pen charms which will help keep their prize pens identified. It's so funny, they all have pens they love to use and have fussed about losing them so I thought the combination of the two little gifts will bring a smile. It's always nice to receive a treat. I'll try to remember to take a picture of the pen charms before I give them to these nice ladies.

If you would like to make yourself and others some of these quick and easy bookmarks you can download the zipped file which has the .svg, .dxf, and Studio files all in one zipped folder by clicking -----> HERE

Here are some pics of three bookmarks I made. I made a lot more....lol. One has a scalloped edge and the other has a straight edge.


Monday, June 17, 2013

For the Kids

School's out but learning is always in. My dear grandson will be in the first grade when school resumes. We were out playing on the sun porch when he and his sister wanted to swing . We have an entire swing set in the back yard but the like the one that hangs by the rafters of the pagoda. Since only one swing can be placed in this area they have to take turns. Of course, as siblings go, not one of them may have one extra minute on the swing so I had them look at the clock on the sun porch and told them what time they would switch out their turns on the swing. I had to tell them; "When the big hand is here it's time to switch." Later, I tried to teach them how to tell time on a real clock (not digital).

Below is the clock I made for them to hang on the fridge. I hope this will help both my granddaughter and grandson with learning to tell time and I hope it will be useful for the little ones in your lives.

All work and no play is no fun. I made flying fish, jellyfish in a bottle, and paper planes. I love making home-made toys for them. I cut them out on plane white card stock so they could decorate them. I'm going to make some sticker for the next time we make these planes. We learned it was best to cut out two plane bodies, glue them together then attach the wings. When time permits I'll share some more of our fun time Summer crafts and toys.They took their planes home so I didn't get a picture.

Both zipped files are in .svg,.dxf, and Studio formats

You can download the "learn to Tell Time Clock" -----> HERE

You can download the "Toy Plane" -----> HERE


Wednesday, June 12, 2013

Ding - Aling Alert!! (Father's Day Pop Up Card)

Sometimes I get going in so many directions and can sure mess things up. This is another one of my
ding-aling moments.

I would like to apologize to all of those whom downloaded the previous Father's Day Pop Up Card. When I test cut it the first time I noticed I had not welded the F and S in the word FATHERS. Instead of uploading the file I fixed, by accident I uploaded the orginal (messed up) file. I hope everyone whom downloaded the file sees this post and will grab the fixed (welded F and S ) file.

Christine, thank you soooo...very much for making me aware of this oopsie . I sure appreciate you letting me know I uploaded that messed up file. Bless You and big hugs, Debbie

You can download the correct Father's Day Pop Up Card -----> HERE


Monday, June 10, 2013

Happy Father's Day Pop Up Card

I know this is cutting it close. I actually had this cutting file made a couple of weeks ago but my Box account ran out of bandwidth and then I kept on forgetting to do the test cut. I finally made the test cut yesterday. It's a good thing I did because I made a big oopsie on the pop up part. I fixed it and now it's ready to share with all of you.

It's been pretty busy place here at the homestead. My Mom is here visiting, my aunt and uncle will be here this Thursday. We've had lots and lots of company and fun family things going on. I hope to be able to get some crafting done in between all of the good company and the cooking I've been doing.

This is totally off topic but I want to share my latest trial and errors in cooking. We were watching Good Morning America and they were tasting the newest food craze; the Cronuts by Dominique Ansel. Since we are way to far from Soho, NY to try these devilish delights, I decided to make some faux Cronuts from the Pillsbury copycat recipe. I had to do a little tweaking by trial and error. I made my own home made Bavarian Cream filling and Caramel Syrup then fried the Cronuts in Grapeseed Oil.I had to get a little healthier somewhere...lol. All I can say is, this is some dangerous stuff....lol. They are amazing! and so worth the burnt ones I had to go through to get it just right.Each one was filled with Bavarian Cream, then covered with a  vanilla glaze, topped off with Caramel drizzle and a very light sprinkle of Kosher Salt.Yes, I let the devil in the kitchen....hee, hee. :) The next batch I make I'll try to get a photo of one before the Cronut Gremlins take them away.

Okay, back to the business of cards and cutting files. I'm going to add some embellishments to this sample card and get in the mail for my Dad. Then I'll make another card for hubby. I hope this file still comes in handy for all of you who are like me and haven't been able to get everything done you want to get done and still need a Father's Day card.

*** For anyone who downloaded this file previously. I apologize. By accident, I shared the file which, I forgot to weld the letters F and S to  the word Fathers. I always test cut my files and discovered I had made this error but still uploaded the wrong file. This link will take you to the correct file.; FATHERS DAY POP UP CARD 2. If you would like this file you can download it -----> HERE  This file is in .svg, .dxf, and Studio formats.


Thursday, June 6, 2013

Crafty and Creative/ Cards and Vinyl

What a blessing it is to meet lots of crafty and creative people. Kim from Scraps of Faith has done it again. Kim is on a design team. She looks high and low for images to create her wonderfully creative cards. When she gets stuck and can't find that perfect element she calls on me. On two of her cute as can be cards she looked for a canopy and a t-paper roll without any luck so I created two more images with the wonderful Studio software for her to use. The "Potty" card is Kim's creation for Mo's Challenge for Children. The images are as darling as they can be. I just love them! Kim brings them to life and her cards always bring a smile to anyone's face.


If you would like to use the two images of the Canopy and T-Paper Roll for you card creations you can download them -----> HERE

Another crafty friend Lori, from My Comfort Cottage shared her lovely Split Letter Monogram Tile using vinyl for her creation. She kindly wrote to me to let me know how much she has enjoyed the video tutorials I make on my YouTube Channel. She used the technique of a video I made called Making A Split Monogram. She sure did a wonderful job. 


You will definitely want to visit Kim and Lori's blogs. They are so inspirational! I find lots of wonderful creative ideas by surfing the web and visiting blogs like Lori's and Kim's blogs.

Thank you Kim and Lori for sharing your awesome creations with me and allowing me to share them on my blog. 


Friday, May 31, 2013

June's Cutting Files Are Here

Good day or evening everyone. In my earlier posts I mentioned, I would try to make a set of cutting files and share a set each month in order to help increase donations. As many of you already know, I am always happy to share the cutting files I make and will continue to share. Each month, as long as time, family matters, and the good Lord permits I'll continue to make files for donations on a monthly basis and will continue to share cutting files throughout the month for all to enjoy.

** To see all of the individual cutting file sets and instructions you'll need to scroll down a lot. For one thing, I chat too much. :)


There are 4 sets of cutting files for this month's donors. Each of the files has been test cut, assembled, and converted into three cutting formats like, .svg, .dxf, and Studio. Each file also has a picture of the finished project.

I was recently asked to join a design team to start selling my files. I thought and prayed about about it. By posting this today you already know my answer. I would love to earn the extra income but not as much as I enjoy sharing.

 Helping others and sharing little things like these cutting files is my blessing. I appreciate any and all donations as it helps me to have funds on hand for those little crafty things we all go through like crazy. I'm also saving for a new computer. My dear old computer has seen better days. Just about all of the keys no longer have letters on them, it's doing all kinds of crazy things but it's hanging on....lol. I must admit to giving it a few mean words. This seems to help...lol Oh, I forgot to add, the "zero number key" has popped out and I can't get it to go back into place. Yes, it's a real gem. I shouldn't say too many mean things about it, I'm fortunate to have a computer.

If you would like to send a donation. I would very much appreciate your kindness and enjoy sending you this set of cutting files. Below are pictures of the cutting files and I'll explain in some detail the assembly for each one.I almost forgot to add; If you send a donation please add to the message area "June" this way I will know you are wanting these files.


Cutting File 1: Surprise Box of Surprises

The cutting file below is easy to assemble. You only need to cut two of the outer parts of the box, glue one end to the other and make sure to leave it open. The lid is what holds it closed. The cutting file includes a beautiful frame and border to decorate with. The finished box will measure 8.5 x4. The bow is not part of the cutting file but it's easy to make. I just cut five strips of 1.5 x 11 inch strips of paper, ran them through a crimper, slightly bent so the strips would meet in the center and added a dab of glue to hold the centers down. Next, I criss-crossed the five folded strips adding glue to each layer to make the bow.


Cutting File 2: Accordion Photo Frame Card

This cute little frame card can be made as large as you want. I try to make all of my cutting files to fit a letter size piece of card stock. You cut out the card ( Accordion Frame Base) then bring your photos into Studio and size them to fit into the rectangles I made for the photos to be placed. After everything is cut out all you have to do next is glue the photos behind the frames they fit in then add the easel to the back. This Accordion Photo Frame Card folds nice and flat for mailing.


Cutting File Set 3: Pop Up Box Card with Secret Message Tag
This is another file easy to assemble. It includes the cupcake, pennant, borders, leaves, flowers, and the zipped secret message tag. All you need to do to assemble this is to do a Print and Cut of the Zipped Secret Message Tag and pennant. Make sure to place enough adhesive around the zipped area so when the recipient pulls on the tab it will easily reveal their hidden message.If it's not glued well enough around the zipped area it won't open easily.

Next, fold the box part on the perforated areas. The two piece which will meet in the center on the bottom need to be glued on the three outer edges leaving the center open. I did it this way so I could place the tag through the slit and then into the opening to better hold the tag into place. Since I forgot to photo it from the side I drew a picture of what the side should look like. The pink is the tag.

Last, cut out the pieces of your cupcake in your choice of colors, add the pennant to the top, assemble your flowers or use other embellishments of you choosing and your card is done. The second photo of this card shows how nicely flat it folds for mailing.

Drawing of Card Box Side


Cutting File 4: Babushka Doll Card

I drew this little cutie in Studio and set it all up to be a card. The little Babushka Doll was Printed and Cut then adhered to the card. The smaller blank doll shape is for adding a sentiment. If you use this to place a sentiment inside your card make sure you print and cut it with the Babushka Doll to save time and paper. Also, don't forget to set your type to "No Cut". I've only done this...well....way too many times...lol. Do as I say and not as I do....hee, hee.